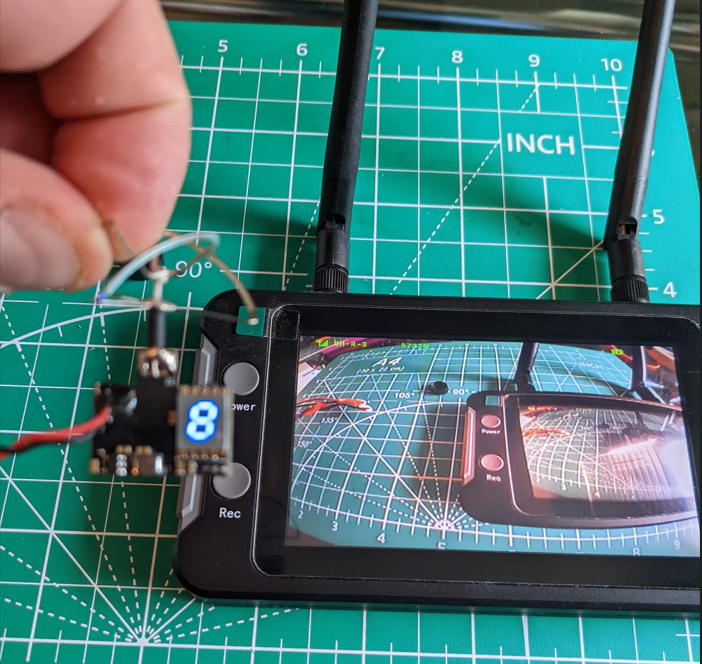
Simple FPV Setup

- Camera + Transmitter + Antenna : Amazon.com: Wolfwhoop WT02 600TVL Ultra Micro AIO Camera and 200mW 5.8GHz Video Transmitter with Clover Antenna for FPV Indoor Racing : Electronics
- Battery
- FPV Monitor: Amazon.com: SoloGood FPV Monitor 4.3inch with DVR 5.8Ghz 40CH 800 x 480 IPS Drone Receiver Monitor Built in Battery for FPV Drone RC Cars : Toys & Games

Quick Setup
- Connect Battery to camera (adaptor might be needed, do not forget to remove the lens cap). Confirm LED indicator is lit
- Power on monitor (hold power button for 2-3 seconds)
- click Auto-Search, wait for signal to be detected. (For me, this took ~15-20 seconds before the signal was found, after which, the signal strength appears in top-left corner)

Camera
NOTE: Be careful/mindful — the 200mW power from this particular transmitter has extremely poor thermal management, it will get hot enough to burn skin
Camera specifications:

As the “Frequency” specification suggests, there is a range of frequencies supported. To change frequencies, press the button according to the specification below.

Camera/Transmitter “Positives”
- lightweight. 4.6g including the camera, transmitter, antennae, and 6cm wire with connector
- extremely easy to use. only needed to plug in the battery
Camera/Transmitter Shortcomings
- as mentioned above, the whole unit gets hot to the touch — hot enough to burn skin. Ideally, if a component gets this hot, there should be a heatsink with fan to remove more of the heat. the 200mW power is relatively high considering the compact design
- The button, atop the transmitter PCB, isn’t immediately apparent and can be quite tough to access due to the antennae getting in the way.
Next Steps
- I want to test the range limit for camera transmitter, see how far the 200mW transsmitter works with a clear line of sight
- test the range and quality of signal with interference (see how trees/buildings/etc effect the signal)
- Try changing the frequency of the transmitter (would be necessary if using multiple cameras simultaneously)
- Experiment more with the monitor (including the “Record” function that saves digital file to microSD card.
- verify the current in-use
- Build pan/tilt mount with fan to improve heat issue